Your Beekeeping Journey: A Step-by-Step Onboarding Guide
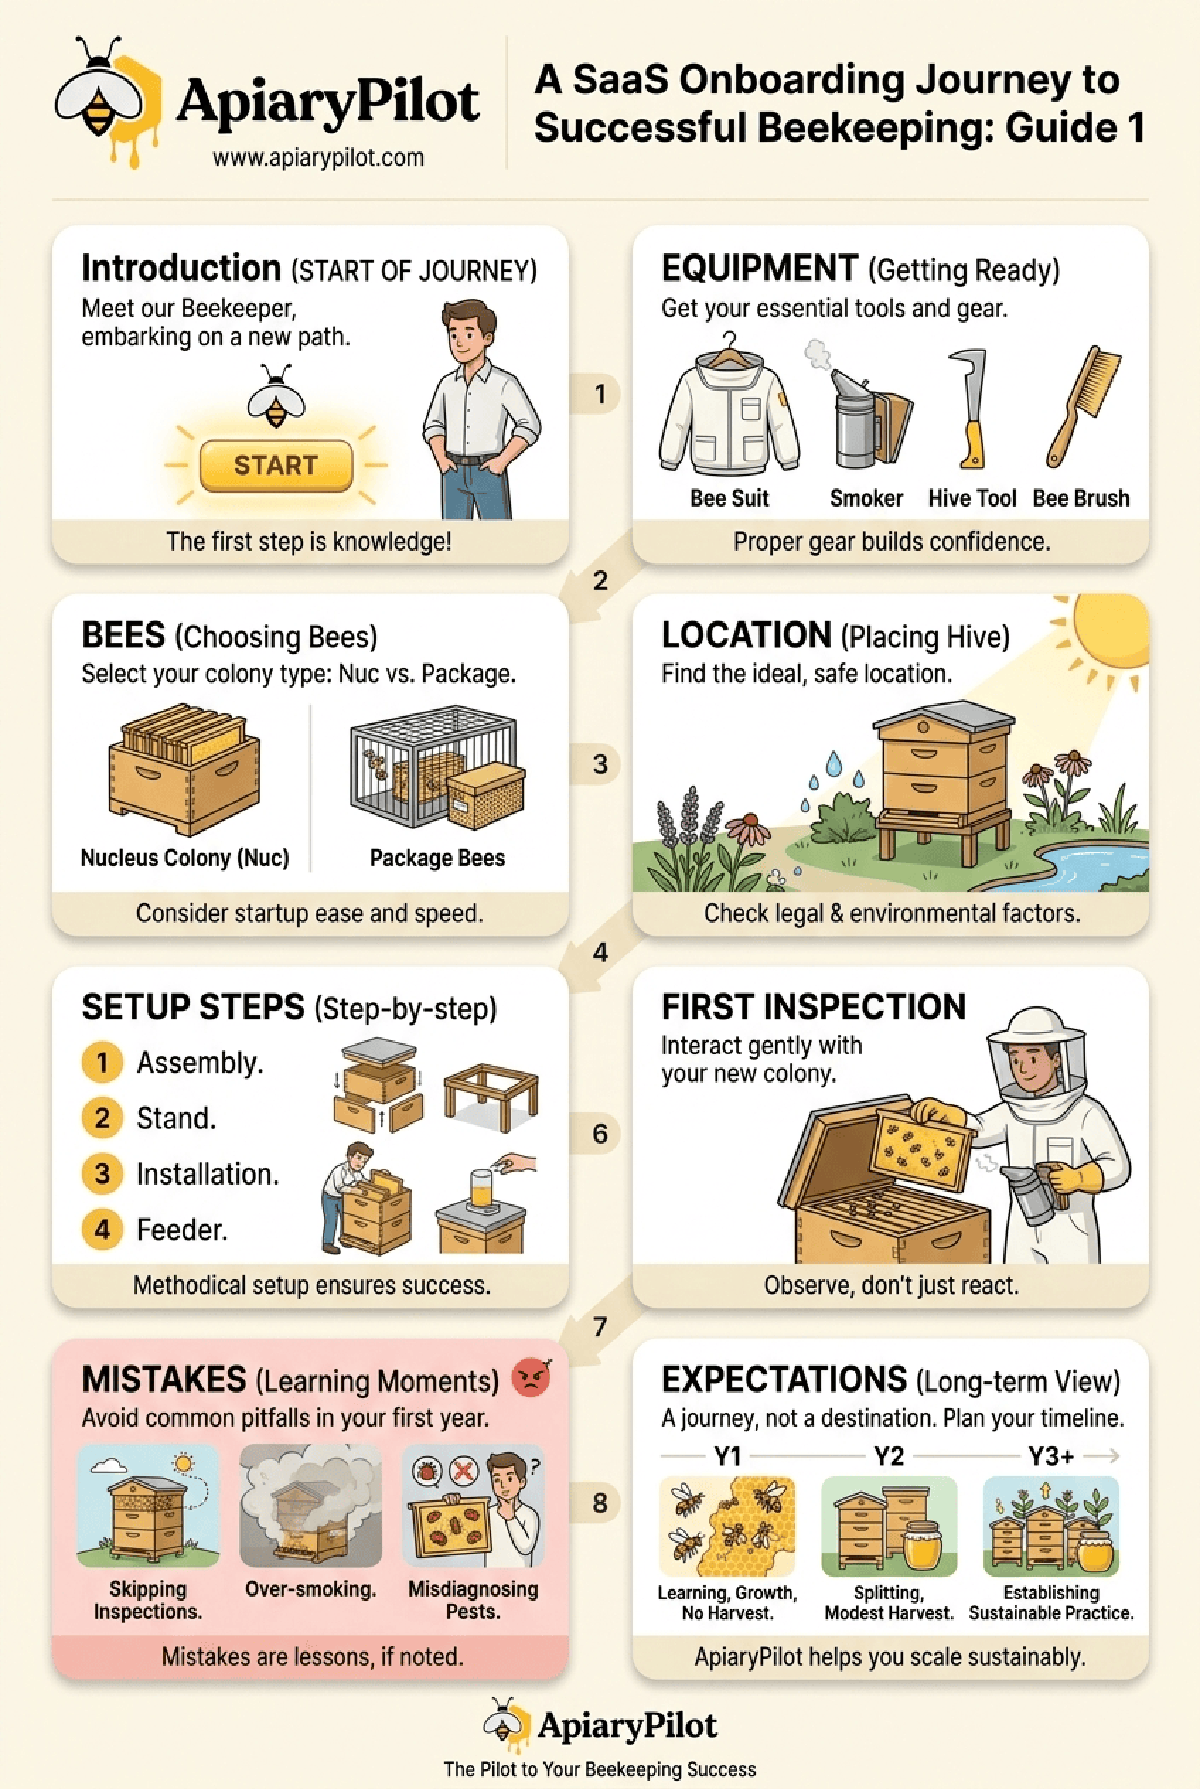
From choosing your first equipment to your first inspection—this illustrated infographic maps out the complete beginner's journey into beekeeping.
About this your beekeeping journey: a step-by-step onboarding guide infographic
This beekeeping infographic turns the key decisions behind your beekeeping journey: a step-by-step onboarding guide into a visual reference that can be used during inspections, planning sessions, or training conversations. It is designed for practical apiary management, so each section highlights the observations, timing, and records that matter most in the field.
Use it as a quick reminder before opening colonies, preparing seasonal work, or reviewing hive notes with another beekeeper. For stronger records, keep the infographic beside your inspection journal and capture the matching hive data in ApiaryPilot, including dates, colony status, treatments, harvest actions, and follow-up tasks.
The download below is suitable for printing or sharing with a local beekeeping group. The embed code lets clubs, educators, and suppliers reference the infographic while linking back to the original ApiaryPilot guide page.
Starting your beekeeping journey can feel overwhelming. There's equipment to buy, bees to source, a location to choose, and an entirely new skill set to learn. This infographic distils the entire onboarding process into a clear, visual roadmap you can follow step by step.
What This Infographic Covers
Our illustrated guide walks you through eight key stages of getting started—from the very first spark of curiosity all the way to setting realistic long-term expectations.

Getting Your Equipment
Before your bees arrive, you'll need four essentials: a bee suit for protection, a smoker to calm the colony, a hive tool for prying apart frames, and a bee brush for gentle handling. Investing in quality gear from the start builds confidence and makes every inspection smoother.
Choosing Your Bees
You have two main options: a nucleus colony (nuc) or package bees. Nucs come with an established queen, brood, and workers on frames—giving you a head start. Package bees are cheaper but require more patience as the colony builds up. Consider your local climate and experience level when deciding.
Finding the Right Location
Your hive placement matters more than you might think. Look for a spot with morning sun, afternoon shade, a nearby water source, and minimal foot traffic. Don't forget to check local regulations—many areas have setback requirements and registration rules.
Setup and First Inspection
Assembly is straightforward: build your hive, place it on a sturdy stand, install your bees, and add a feeder for the first few weeks. Your first inspection should be gentle and observational—resist the urge to over-manage. Simply confirm the queen is present and the colony is settling in.
Common First-Year Mistakes
Every beekeeper makes mistakes—the key is learning from them. The most common pitfalls include skipping inspections (leading to missed problems), over-smoking (which stresses the colony), and misdiagnosing pests (which delays treatment). Keeping detailed notes in ApiaryPilot helps you spot patterns and avoid repeating errors.
Setting Realistic Expectations
Beekeeping is a journey, not a sprint. In Year 1, focus on learning—don't expect a harvest. By Year 2, you may split your colony and enjoy a modest honey crop. From Year 3 onward, you'll be establishing sustainable practices and potentially expanding your apiary. ApiaryPilot helps you track this progress and scale with confidence.
Ready to elevate your beekeeping?
Start tracking your hives, inspections, and harvests with ApiaryPilot — the modern hive management platform built for beekeepers like you.
Get started free