How to Safely Transport a Beehive: A Visual Step-by-Step
Moving hives doesn't have to be stressful. This illustrated infographic walks you through every stage of safe hive relocation—from preparation to the adjustment period.
About this how to safely transport a beehive: a visual step-by-step infographic
This beekeeping infographic turns the key decisions behind how to safely transport a beehive: a visual step-by-step into a visual reference that can be used during inspections, planning sessions, or training conversations. It is designed for practical apiary management, so each section highlights the observations, timing, and records that matter most in the field.
Use it as a quick reminder before opening colonies, preparing seasonal work, or reviewing hive notes with another beekeeper. For stronger records, keep the infographic beside your inspection journal and capture the matching hive data in ApiaryPilot, including dates, colony status, treatments, harvest actions, and follow-up tasks.
The download below is suitable for printing or sharing with a local beekeeping group. The embed code lets clubs, educators, and suppliers reference the infographic while linking back to the original ApiaryPilot guide page.
Whether you're relocating to a better forage area, consolidating apiaries, or moving hives to avoid a neighbour dispute, transporting beehives safely is a critical skill every beekeeper should master. Get it wrong, and you risk injuring bees, losing a queen, or causing a swarm in your vehicle.
What This Infographic Covers
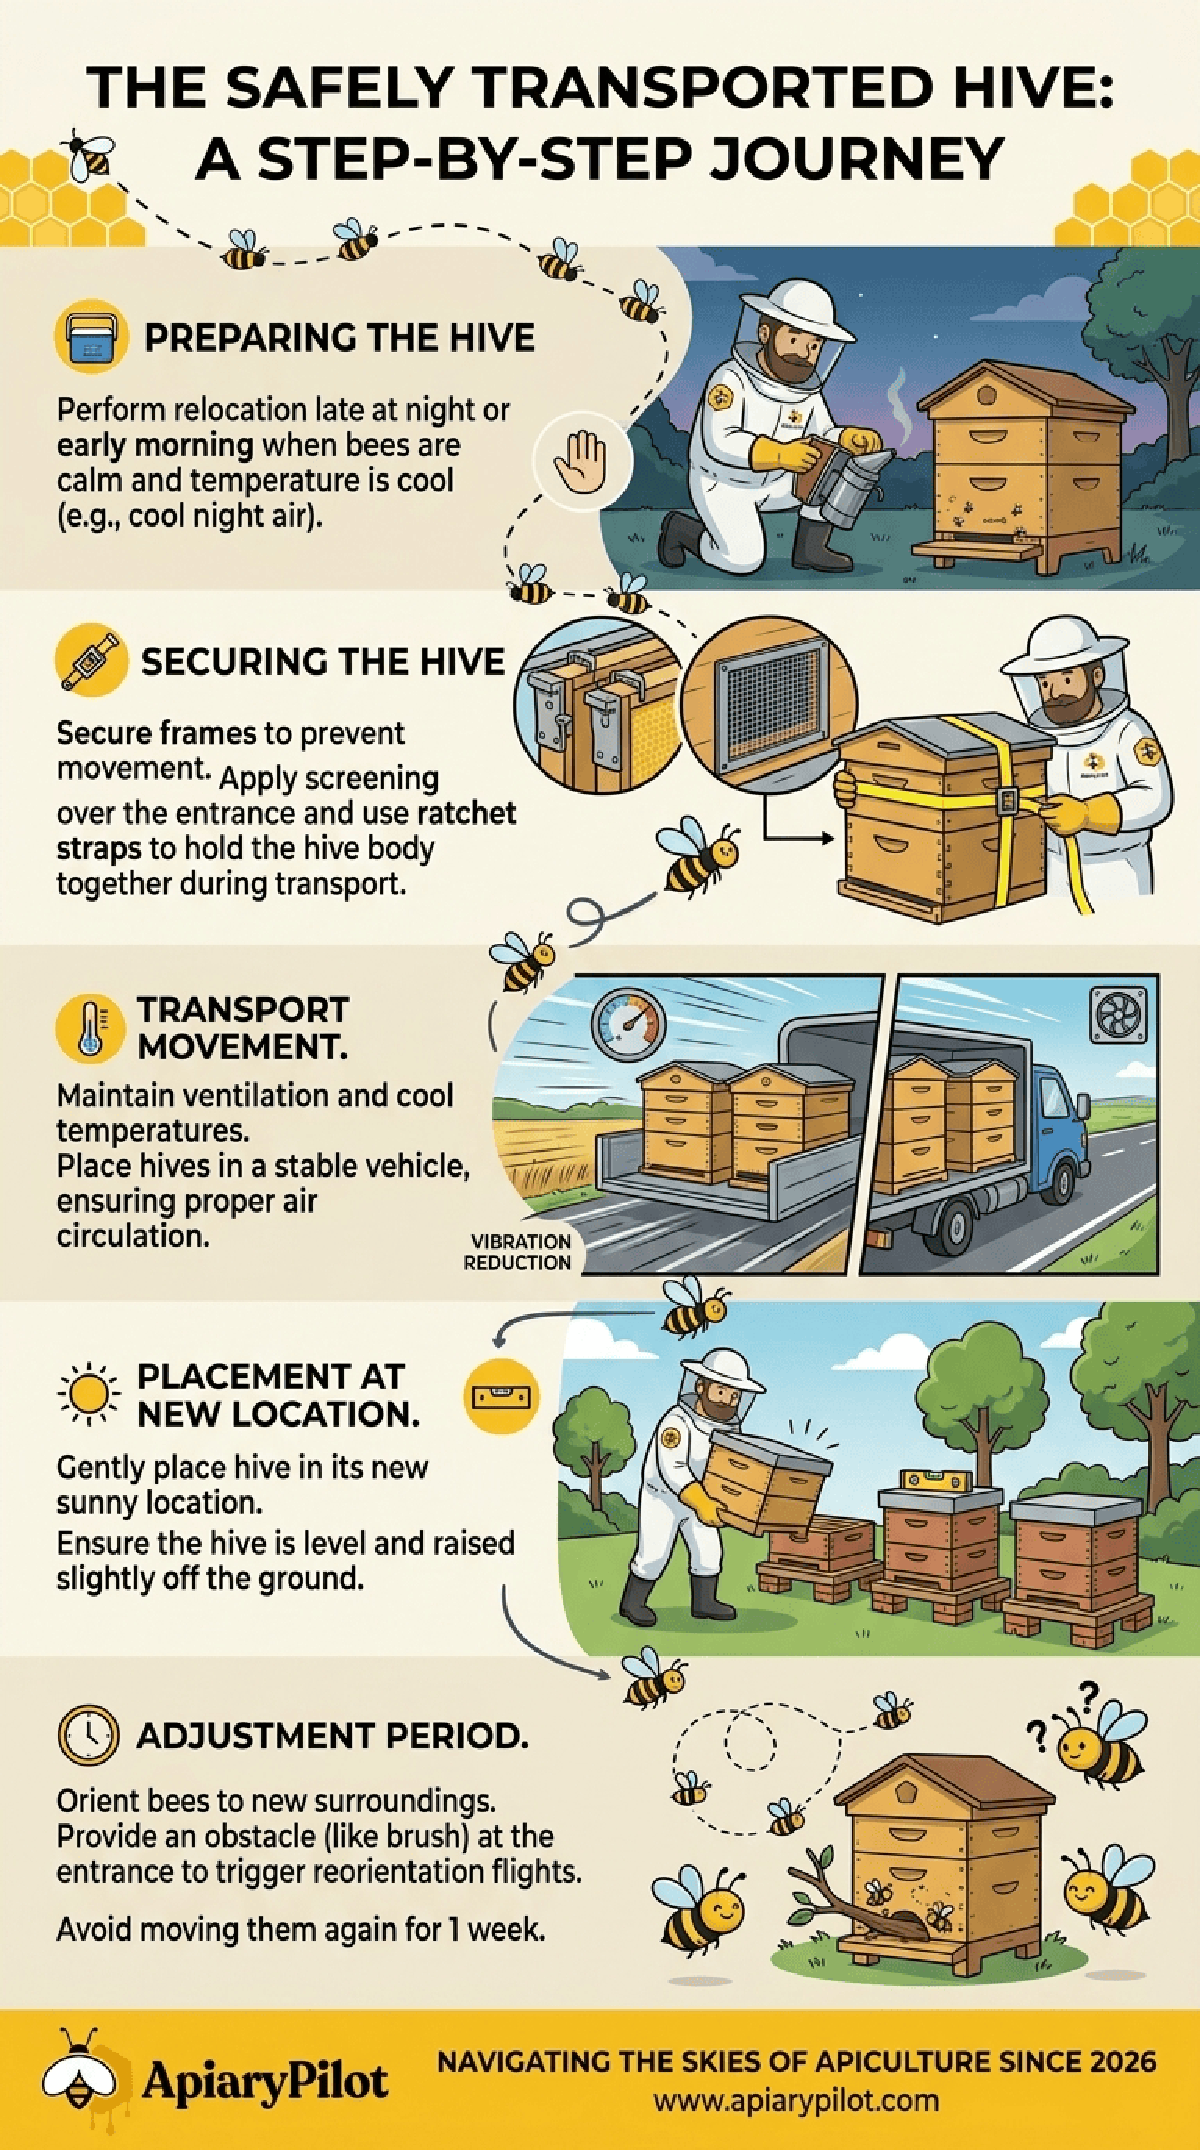
This visual guide breaks down the entire hive transport process into five clear stages, from preparation through to the adjustment period at the new location.

Preparing the Hive
Timing is everything. Always plan your move for late evening or early morning when bees are calm and most foragers have returned to the hive. Cool temperatures reduce activity and make the process safer for both you and the colony.
Securing the Hive
Before you lift anything, secure all frames to prevent movement during transit. Apply screening over the entrance to keep bees contained while allowing airflow. Use ratchet straps to hold the hive body components together—a single bump on the road can separate boxes if they're not properly secured.
Transport and Movement
Place hives in a stable vehicle with adequate ventilation. Avoid sealed car boots where temperatures can spike rapidly. Maintain cool airflow throughout the journey, and minimise vibration by driving slowly over rough terrain. If you're moving multiple hives, ensure they can't slide into each other.
Placement at the New Location
At your destination, gently place the hive in its new position. Choose a sunny spot, ensure the hive is level, and raise it slightly off the ground on a stand. Open the entrance once the hive is settled—but do so gradually to prevent a rush of confused bees.
The Adjustment Period
Bees navigate by landmarks. After a move, they need to reorient to their new surroundings. Place a small obstacle (like a branch or handful of grass) at the entrance to trigger reorientation flights. Avoid moving the hive again for at least one week to let the colony fully adjust.
Log your hive relocations in ApiaryPilot to keep a complete history of each colony's movements, and set follow-up inspection reminders to check on the bees after the transition.
Ready to elevate your beekeeping?
Start tracking your hives, inspections, and harvests with ApiaryPilot — the modern hive management platform built for beekeepers like you.
Get started free